


When we started building custom DIY drawer organizers for our messy and disorganized drawers, we quickly learned something. When something has a super dedicated spot, you’ll actually put it back and things will continue to stay organized. Out of all of the drawers we’ve organized over the years, the only drawers we’ve never had to revisit are ones with hyper-specific custom drawer organizers.
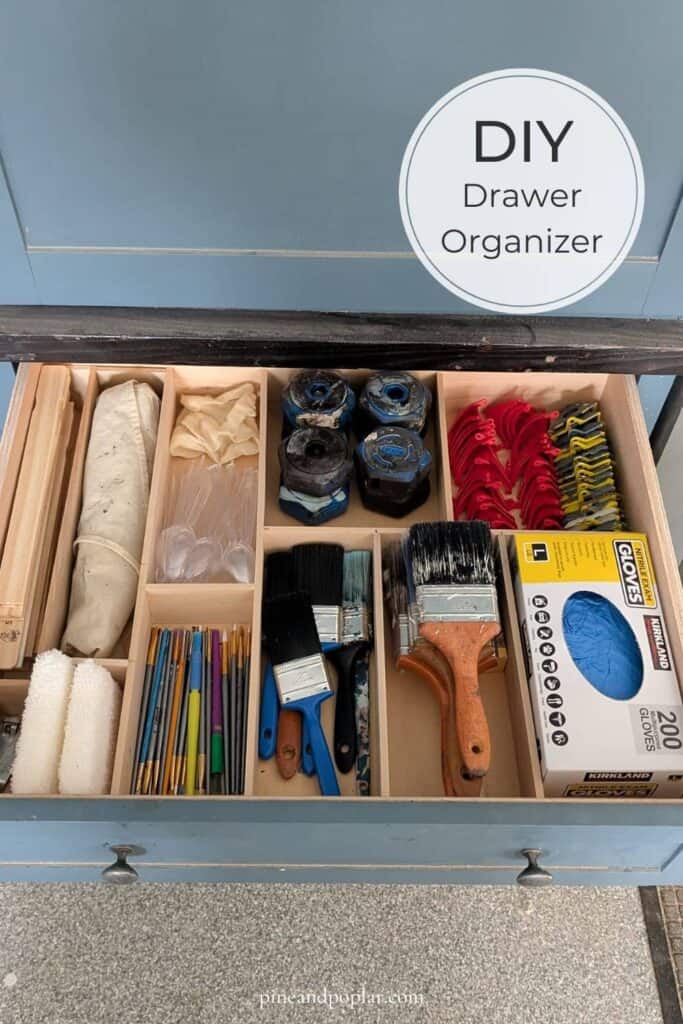
The good news? These DIY drawer organizers are easy to make. They don’t even require power tools if you don’t have any.
Alright, let’s dive in and build some easy DIY drawer organizers!
Recommended Tools:
- Miter saw or handsaw with miter box
- Measuring tape
No drill and no nailer are required for this DIY. These drawer dividers are built entirely with glue. A clamp or two are also helpful, but we didn’t use them on every divider we made, so they aren’t technically required.
What You’ll Need:
This post contains affiliate links for your convenience (which means if you make a purchase after clicking a link, I earn a teeny-tiny commission, but it won’t cost you a penny more)! Click here to read our full disclosure.
- ¼” x 3″ poplar boards (we also used a ¼” x 2″ poplar board for areas where we didn’t want the dividers to be as high)*
- Super glue – we like this Gorilla Max Strength Construction Adhesive
*Okay, so I unfortunately can’t tell you how many boards you will need, because it will completely vary based on your drawer size and the exact dividers that you choose to create.
You also don’t need to use these exact boards. You can also use 1/4″ x 2″ boards, or 1/2″ thick boards, or rip down 1/4″ plywood to create strips that you can cut to length. Our go-to are the 1/4″x3x4 boards, but don’t feel like you have to use that. Also, please note that these boards are actually 2.5″ wide, rather than the full 3″. Read more about wood sizing if that’s unfamiliar to you!

How to Build Custom DIY Drawer Organizers
STEP 1: MEASURE YOUR DRAWER WIDTH
Measure and cut (2) pieces that are the same width as the inside of your drawer. You want it to be a snug fit so that it doesn’t move around.
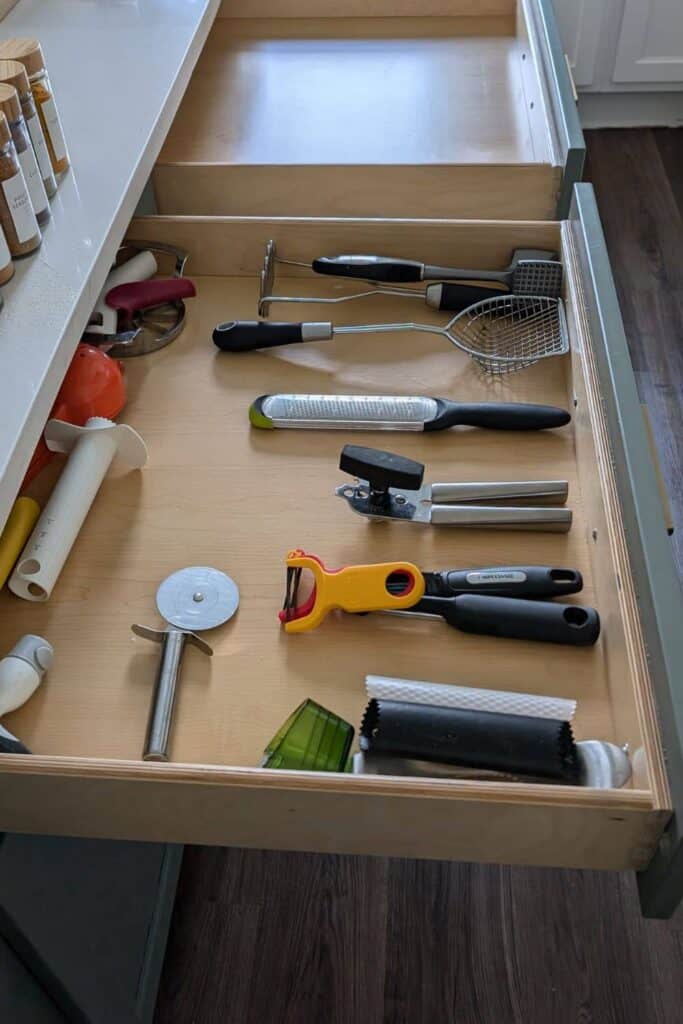
If you prefer for the drawer divider to only cover half of the drawer like in the example below, that’s okay too, but you’ll want the sides to stretch fully from front/back so that it can fit snugly in the drawer.
STEP 2: ORGANIZE YOUR DRAWER
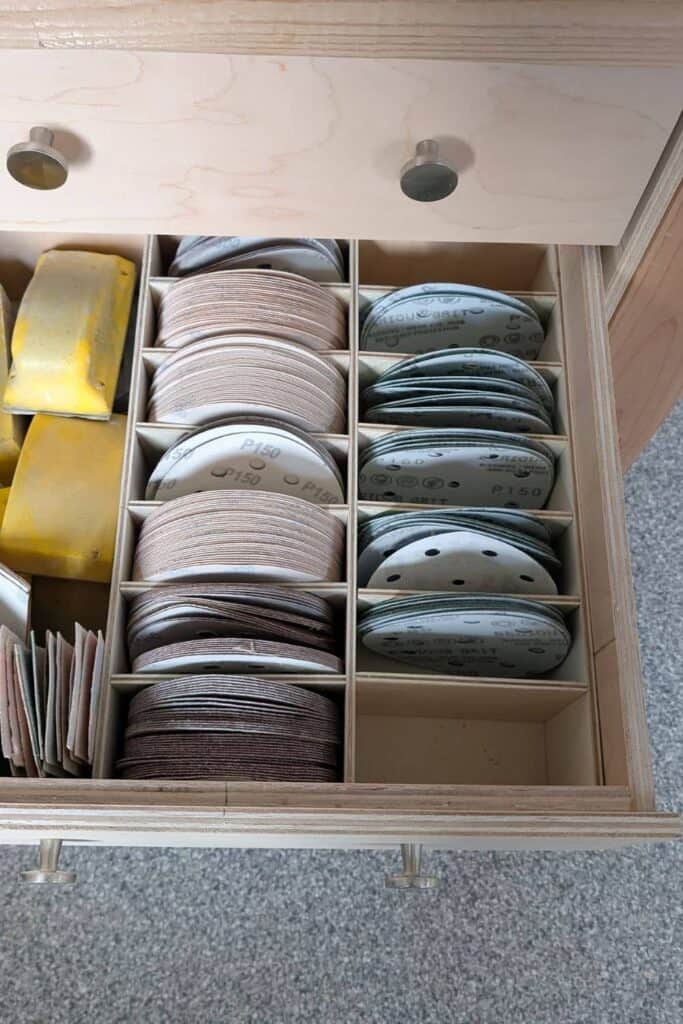
Organize the items in your drawers to decide how big you’ll want each compartment. Personally, I like when everything has a very specific place, so I prefer more compartments.
STEP 3: MEASURE AND CUT DIVIDERS
Measure the lengths needed for each of the dividers and make your cuts. If you have multiple pieces that are all the same length, you can cut those at the same time. If you have different sized compartments that are based on the sizing of another compartment, cut one piece at a time and then place the divider in the drawer and measure for the next piece.
STEP 4: MARK YOUR PIECES
Now that you have everything cut and mapped out, mark where to glue each of the pieces. Personally I prefer to just mark rather than measuring every piece. I simply mark with a pencil on each side of where the boards meet. Once I mark one piece (like the bottom), I use that to transfer my measurements to the other board where the piece intersect.
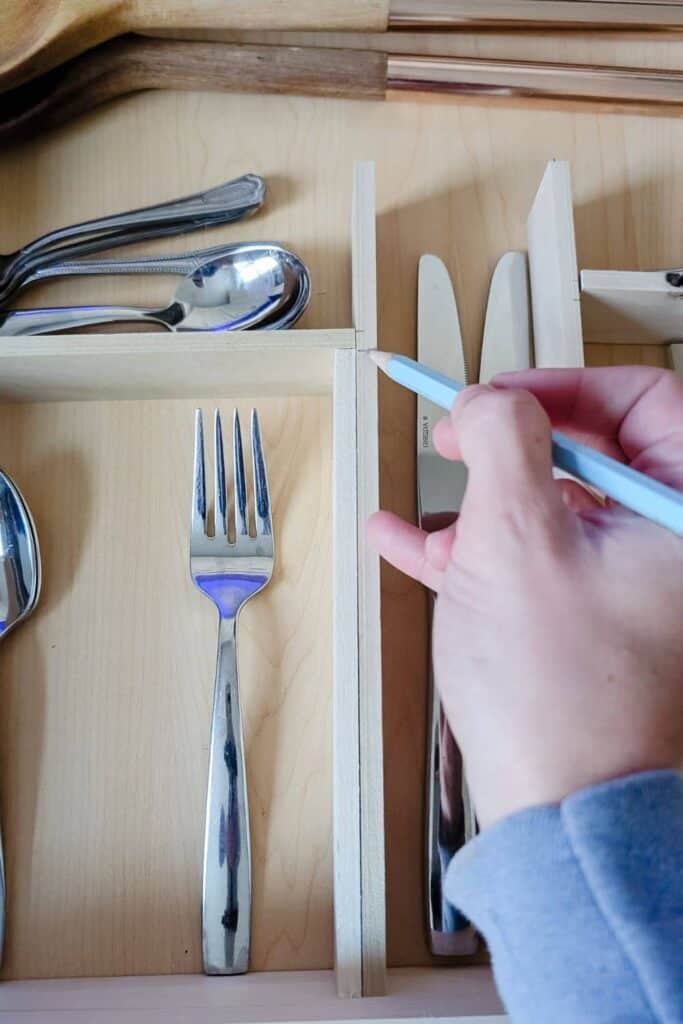
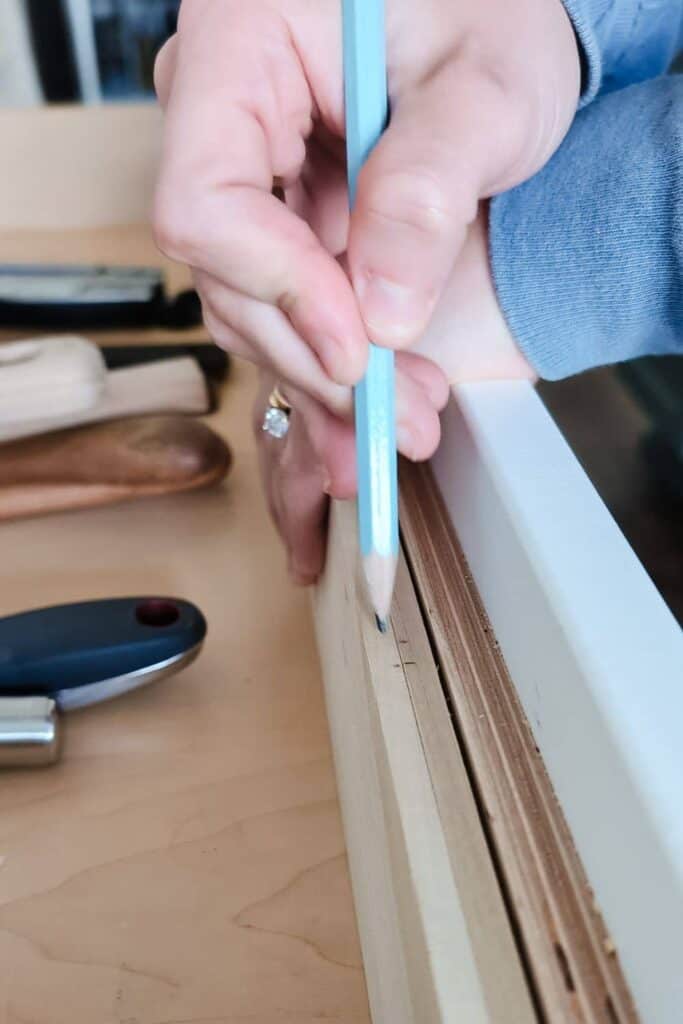
For example, on the drawer divider pictured above, I first marked where all of the pieces hit the bottom board and then I lined the top board up with the bottom board and transferred all of my lines. Again, you can measure, but I prefer this method.
If you’re worried about pencil lines, you can mark with painter’s tape instead.
STEP 5: GLUE EVERYTHING TOGETHER
Glue your pieces together. With the particular super glue that we chose, you are able to reposition things if needed. You also don’t have to join the surfaces immediately, so we were able to add glue to all of pieces for a drawer divider before assembling. As you join two pieces together, hold it for 15-30 seconds before moving onto the next piece.

If you have a more complicated set of drawer organizers like we had for our silverware drawer pictured below, you can break up your gluing into a few different sections before assembling it all together. We glued the sections highlighted in blue and green, let it dry, and then assembled the rest.

There you have it! Now you know how to make your own custom drawer dividers. For deeper drawers, we’ve repeated the exact same process, just with taller pieces of plywood vs. the 1/4″ poplar boards.

Good luck – once you get started, no drawer will be safe from your custom drawer dividers!! But seriously, you’re going to love them. There’s something that feels so freeing about everything having it’s dedicate place.


If you’re concerned that you’ll eventually get new things or replace some items in your drawers, you can also make some adjustable drawer dividers. These are super handy if you feel like you’re prone to swapping things around!
If you’re in the mood to tackle all sorts of kitchen organization, keep reading the following tutorials:


")


