


From creating artwork to designing our stencil for the bathroom tiles , Adobe Illustrator is my go-to program. It’s not necessarily the go-to program for designers and woodworkers, but it’s what I’ve always loved and used. My favorite part about it? It’s super easy to get the hang of. Once you know how to work the basic program, you can create so much. And if you love it and want to keep growing your skills? You can create nearly anything! It’s a really powerful tool, but it’s also great for beginners.
I love it, but…
Unfortunately, Illustrator doesn’t have a free version. But don’t let that deter you just yet! You can get a 7-day free trial of the program. And like I mentioned earlier, it’s pretty easy to get the hang of, so you can create a lot of really cool things in 7 days. Before getting the trial, I recommend thinking of a few projects that you want to create and then knock out those plans during your trial. You can create solid designs, get all of your measurements, and all of the angled cuts you need. All this will make your life MUCH easier and it’ll cut down on surprises and inaccurate cuts during your project.
I love Illustrator so I pay for the annual membership, but if you only have a project or two coming up, the free trial is perfect for you!
Alright, let’s dive on in.
Before we begin
Before we create anything, there are a few things we need to get out of the way. First, I’ve found that creating a rough sketch on a piece of paper makes the design process easier later. Don’t worry about spacing or the exact number of boards you will use, just sketch a rough idea that you can refer to later.
Once you’ve sketched your design, it’s time to measure your room. Try to be as precise as possible in this step and measure at least twice. How well you measure here will determine how accurate your board measurements are later. You’ll need to get all of the measurements of your wall including:
- Distance from top of baseboard to ceiling
- Width of the entire wall
- Distance to window (from the ceiling, top of the baseboards, and corners of the wall)
- Distance to outlets (from the top of the baseboard, from the corner)
- Size of outlets
- Size of window
- Note: if you are removing or replacing the baseboard as part of your design, be sure to measure from the floor to the ceiling. Since we weren’t touching the baseboards, we did not include it in our sketches.
1. It’s time to jump into Illustrator!
If you do not already have Illustrator downloaded, you can go to https://www.adobe.com/products/illustrator.html.
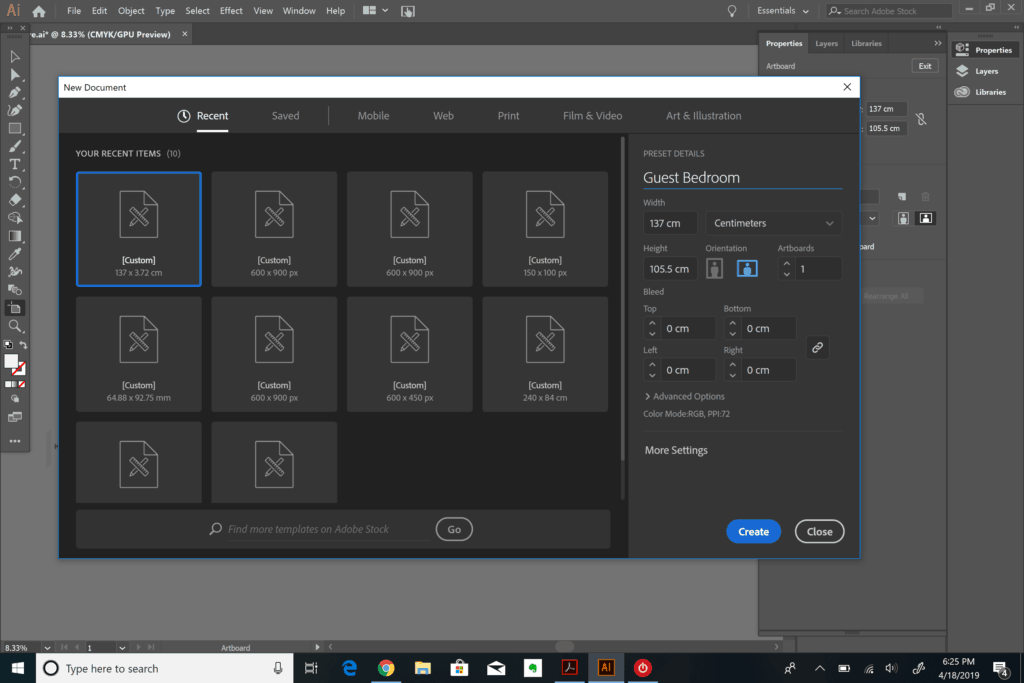
Once you get it downloaded, it’s time to create your artboard. Even though your measurements are in inches, you don’t want to choose inches. The file would be way too large! I usually choose cm, but mm would also work just fine! Don’t worry about converting your room measurements into cm or mm. Just enter them as if it were in inches and ignore the units from here on out ?
After you’ve entered the width and height of your room and selected either cm or mm as your unit, click “create.”
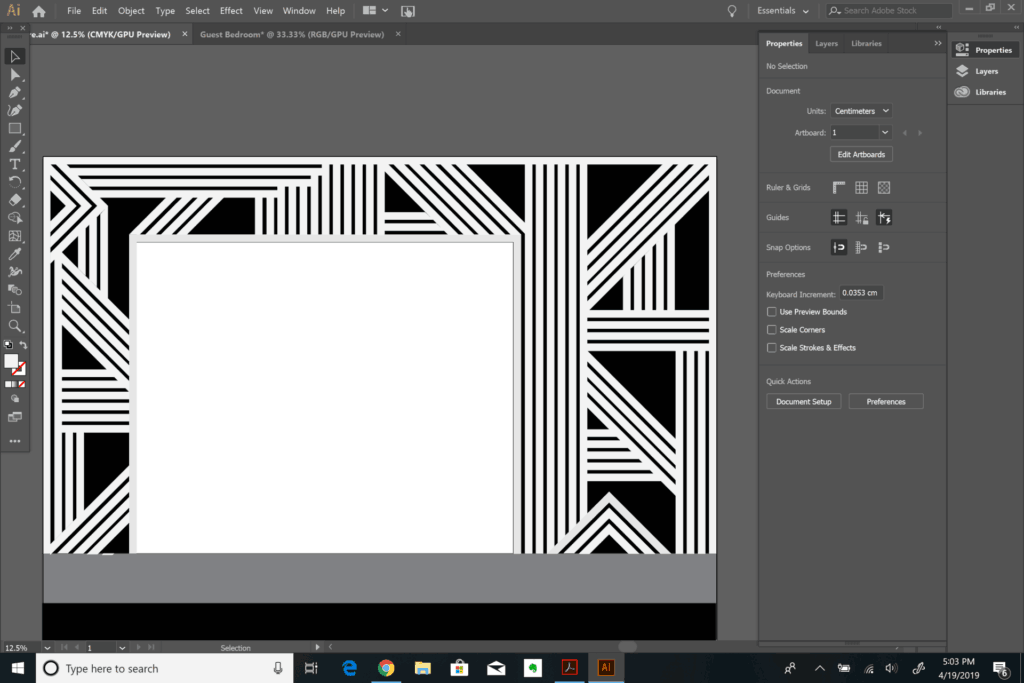
Ta-dah! You have an artboard. I told you this was easy-peasy!
Now we’re *almost* ready to start creating things. Before we do, I want to show you the Properties Panel. On the right side of your Illustrator window, you should see something that says “Properties.” If the panel is not already expanded like the screenshot below, you just need to click on “Properties” to expand it. This panel will have a lot of the key information for you, all in one place!
2. Create rectangles and add obstacles
One of the most difficult things about feature walls is working around outlets, windows, and other obstacles. You can definitely cut your boards around them, but this is an extra step and an extra potential headache. My preference is to avoid them altogether through strategic design!
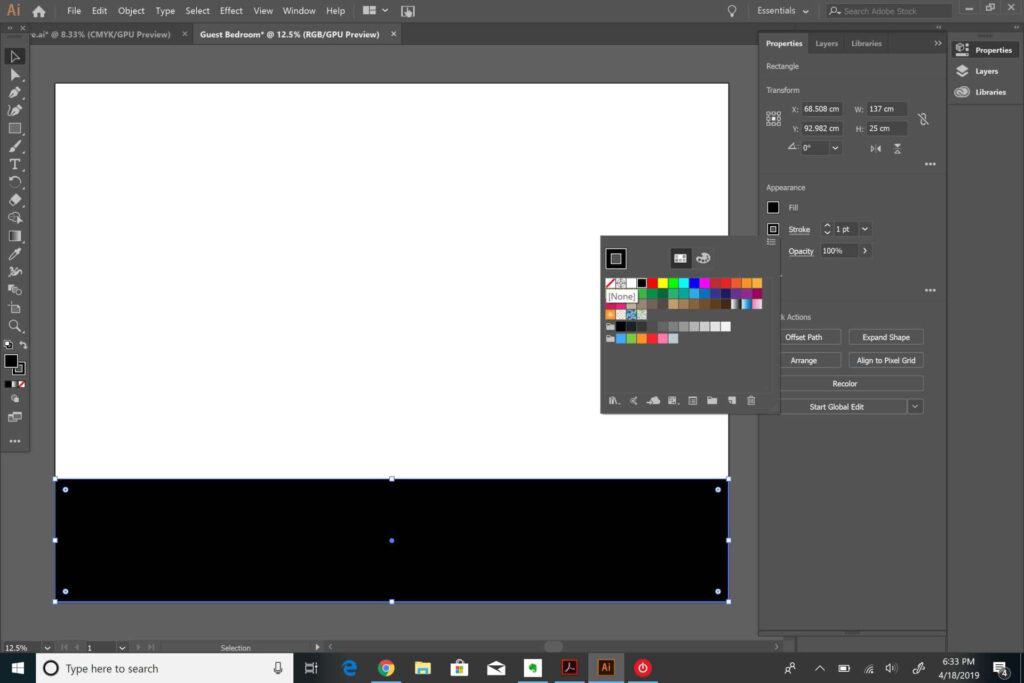
To add in any obstacles (baseboards, windows, outlets, etc.), open the rectangle tool. A keyboard shortcut is to click “m” on your keyboard, then double-click anywhere on your artboard to open the dialogue box. The dialogue box will ask you dimensions. Enter your measurements. Remember, ignore the units!

Now you need to position it in the correct spot. To do this, you can create a guide box. Even though I called this a guide box, it’s just a normal rectangle and you create it the exact same way you created your first object. If you know your window starts 28″ from the right wall and 17″ from the ceiling, you can create a rectangle that is 28×17 and drag it to the top right corner. To drag it, you will need to transition to your selection tool by pressing “v” on your keyboard. After you’ve pressed “v,” you will be able to click and drag the guide box. It will “snap” into place. You’ll know you have it correctly positioned when two pink lines show up and small text that says “intersect.”
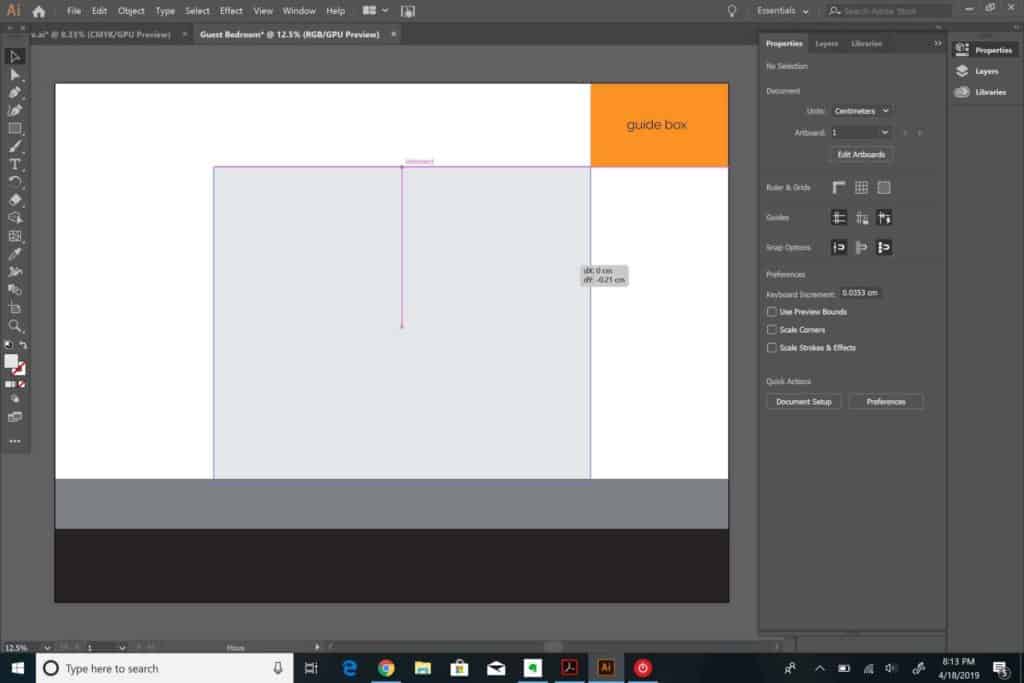
Once you’ve placed your guide box, you can move your object to the corner of the guide box. Again, you will know it’s in place when you see pink lines and the word “intersect.” After correctly positioning your obstacle, you can delete your guide boxes by selecting the object and pressing “backspace” or “delete.”
3. Create boards and spacing guides
Now it’s time to create our boards and determine spacing! If you are using 1x2s, your boards will each be 1.5″ wide. To ensure consistent spacing between our boards, we rotated the 1×2 on its edge between each board, so the gaps were 0.75″ wide.
Click “m” and make two rectangles, one 1.5 wide, and one 0.75 wide. Don’t worry about the lengths just yet.
Adjust the color of the spacing guide (0.75 wide) so that it’s easy to tell that this is a spacing guide and not a board you need to cut. To adjust the color, press “v” then click on your spacing guide to select it. The properties panel will automatically update and you should see a box next to fill and stroke. Click the square next to “fill” and select any color you like. I like a light gray so I know it’s not just the background and then I choose black for the board for high contrast.
I also like to remove the stroke on both my spacing guide and boards by reducing the stroke width to zero.
Once you’ve adjusted the colors, drag the spacing guide next to the board until it snaps into place. Next, you will want to select both the spacing guide and board by holding shift and clicking on both. Once both are selected, go to the bottom of your properties panel and select “group.”
Before moving onto the next step, grab the sketch you created of your feature wall and decide where you want to start. I recommend starting by framing windows or your wall. If you don’t have anything to frame, start with a straight board that stretches fully from top to bottom or side to side.
4. Resize your boards and spacing guides
Since you already grouped your board and spacing guide, when you click on your board or spacing guide, it will automatically select the other as well. When you click on the object, you will see small blue boxes on the corner and middles of your object. These allow you to resize. Because you do not want to adjust the width, click and drag from the middle box on either the top or bottom to make your object shorter or taller.

If you are only seeing boxes on the corners of your boards, you will need to zoom in. On a PC, you can do that by clicking ctrl + +. On a Mac, cmd + +.
Note: The first plus in this tutorial always means “and.”
5. Duplicate objects
To create boards that are the same size as ones you already created, you can select your board and sizing guide and press ctrl+c, then press ctrl+v on a PC (cmd+c, then cmd+v on a Mac). Once they are duplicated, click on the new object and drag it into place.
6. Rotate objects
For our wall, we wanted to keep it as simple as possible (lol there are so many angled cuts), so we worked exclusively with 45-degree angles. You can create any angle you want to, but make sure to pick something that your miter saw can do!
Select the board and spacing guide that you would like to rotate. Move your cursor into the top right corner of your object until you see a rounded double arrow appear. Click and drag your cursor down or up to rotate the object. If you are only working with 45-degree angles, hold shift while dragging your cursor. This will ensure that the object snaps around in 45-degree intervals.
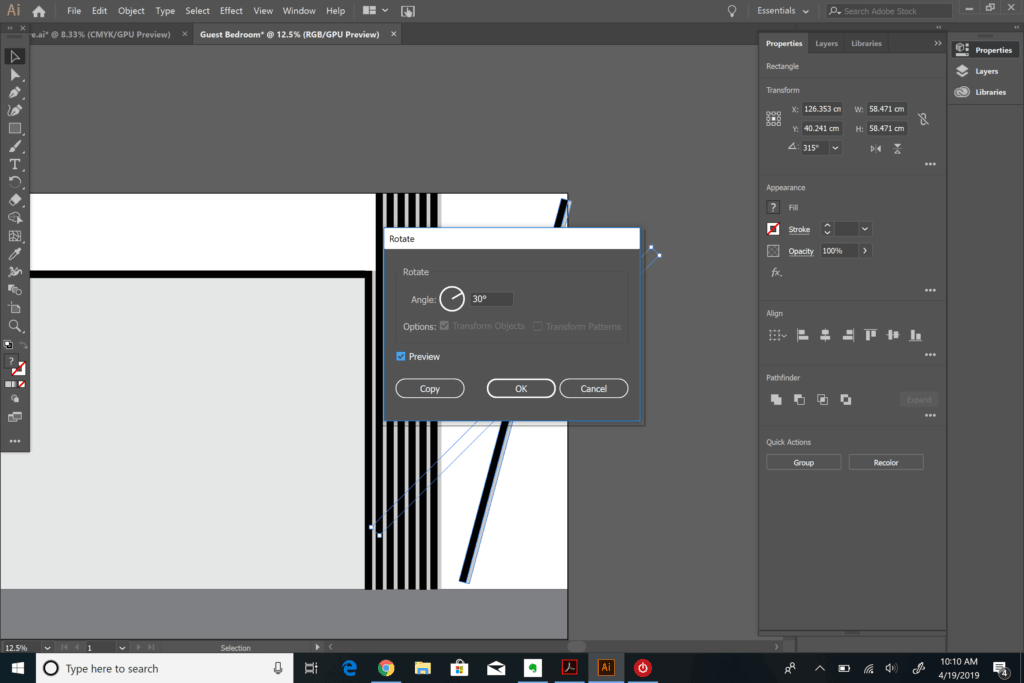
If you are wanting a precise angle that is not 45-degrees, you can right-click your board and spacing guide and select transform –> rotate. A dialogue box will pop up and you can enter the exact angle you want.
7. Create angled edges
To create an angled edge, start by rotating your object and aligning the bottom corner of your board with the board that you want it to line up to. Remember, you want your board to line up to another board, NOT the spacing guide.
Create a rectangle (m –> click + drag). The rectangle does not need to be a specific size. It just has to be large enough to cover the part of the board that you would like to remove.
Place the rectangle in line with the board that your angled board will be up against.
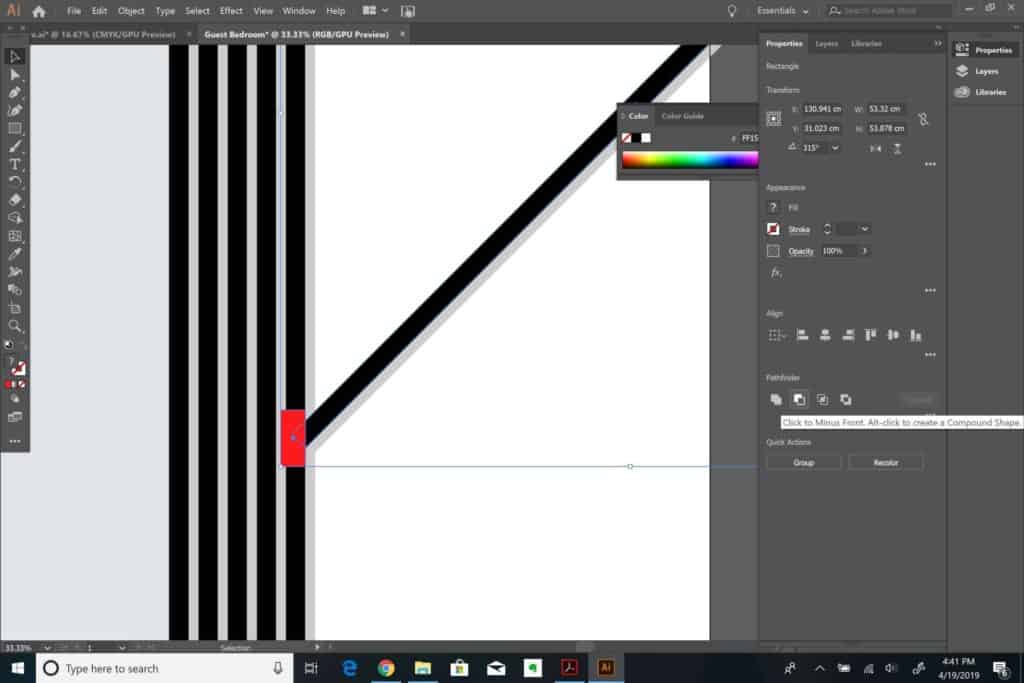
Ungroup your board and spacing guide by clicking on the board and selecting “ungroup” at the bottom of the properties panel. You need to ungroup the boards or else your spacing guide will get deleted during the next step!
Once ungrouped, select just the board and new rectangle by holding shift and clicking on both. On the properties tab on the right side of your screen, select minus front. Repeat with the spacing guide if desired.
Regroup your board and spacing guide and copy and paste until you have the number you need.
A few more tips to know
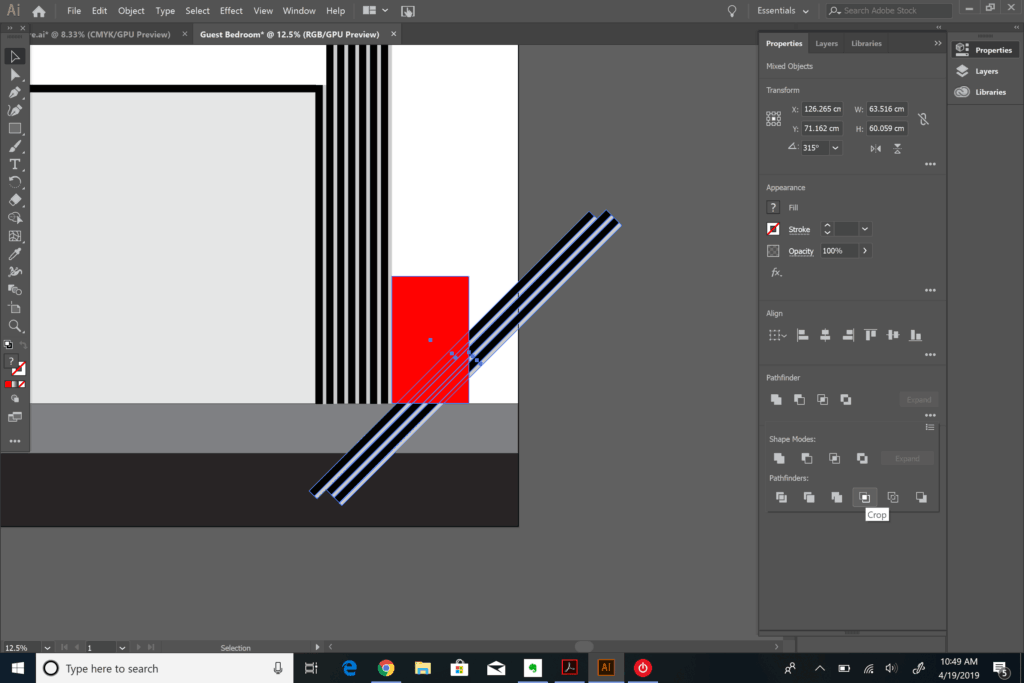
- If you want to angle and size multiple boards at once, you can create a box that is the size that you want your boards to be. It will crop inside your rectangle. Place the box on top of your boards and select the box and all your boards. On the properties tab, click on the “…” under “pathfinder”. Select crop.
- To select multiple objects at once, you can drag your cursor over the objects. If you accidentally select an item you didn’t want to, hold “shift” and click on the item you didn’t want to select. This will unselect it.
- To make arrows, start by creating one side. Then select all of the boards that you’ll want to reflect. Right-click, select transform –> reflect. Check the preview box to ensure you are reflecting in the right direction. Select “copy.” Then it’s as simple as positioning the reflected boards.

Now you have the skills you need to design your feature wall! Using your sketch as a general guide, repeat these steps until your perfect accent wall. You’ll likely have to add or subtract boards from your original sketch, but it’s a great guide to get you started and know where you want angled boards.
Once your design is all sketched, it’s time to get your measurements! This is one of the biggest benefits of creating your design in Illustrator. No double-measuring or incorrect measurements!
9. Get your exact measurements
- Since everything is grouped, you will first need to use your direct selection tool to select individual boards. To use the tool, simple press “a” and then click on the board you want to select.
- For vertical and horizontal boards, it’s really easy. Select a board, go to the properties tab and look at the W and H dimensions in the transform section.
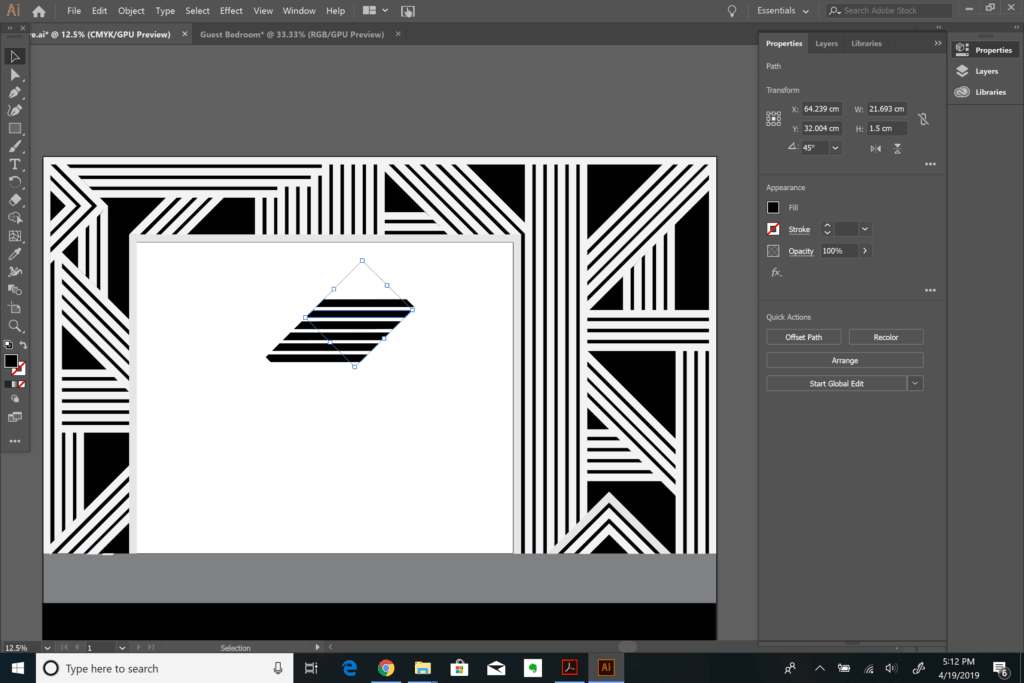
- For angled boards, you will need to rotate them so that they are either horizontal or vertical. Remember, if you used 45-degree angles, you can hold shift when rotating to get it exactly 0 or 90-degrees.
- I like to select a section of boards, copy and paste them, and then rotate. You will need to select them with your selection tool. To switch to this tool, simply press “v.” Once they are rotated, you can go back to your direct selection tool (a) and click on individual boards to see the dimensions. The dimensions will be for the longest part of the board.
Creating your accent wall in Illustrator might sound like a lot of work, but it’s well worth it! By pre-planning, you save so much time when you’re cutting and placing your boards. You know the exact spacing and can plan ahead to avoid outlets if you want to. You also don’t have to do guesswork on angles or double-measure anything. In fact, you don’t need to measure at all! Everything is spelled out for you with more precise dimensions that you would have come up with yourself.
Fair warning: The paragraph above is true for about 99% of the wall. Unfortunately, no wall is perfectly straight or perfectly square, so you might have to adjust a measurement here or there, but by and large, your cuts will be spot on!
If you found this tutorial helpful, we’d love if you shared it with your friends! We can’t wait to see the fun feature walls you create!


")


