


A patio is a great investment for your home, both now and for the future. Everyone loves a good outdoor space to hang out in and enjoy the good weather, and when you go to sell, it’s something that buyers will love too!
When we started researching options for patios, we quickly realized how expensive patios can be (no wonder not everyone has them). On top of that, there are a million different options for what to use on your patio.
After hours (probably 50+) of researching and comparing pricing, we finally decided on porcelain pavers. They aren’t currently a very popular option for patios, but they should be. The cost ended up being comparable to brick or concrete pavers, but they had the look of an expensive Los Angeles rooftop.

Alright, let’s start DIYing!
This post contains affiliate links for your convenience (which means if you make a purchase after clicking a link, I earn a small commission, but it won’t cost you a penny more)!
Tools
- Tape measure
- Shovel
- Pick axe (if your ground has as many rocks as ours did)
- Hand tamp/compactor
- Wheelbarrow
- Work gloves
- Knee pads (if you’d like)
- A 2×4 or other long spare piece of wood
- Level
- Optional: wet saw (we strategically planned our patio so that you wouldn’t have to cut any pavers, so we won’t talk about a wet saw from here on out)
What You’ll Need
- Pavers
- 3/4″ crushed gravel rocks
- Paver sand
- Heavy duty landscape fabric
- Polyermic sand for grout
- Spacers for pavers
DIY Patio with Porcelain Pavers
New to DIY? Download our free 5 Steps to Getting Start with DIY guide!

Before digging, it’s always a good idea to check with your utility companies to ensure you don’t accidentally cut any cables or pipes. In NC, we have a quick hotline to contact that will come mark your utility lines for free. If you’re not sure who to call, check out this map for guidance.
Step 1: mark the border of the patio
Make sure to take into account the size of the pavers and the size of the grout lines. We measured ours out so that we wouldn’t have to cut any of the tiles.
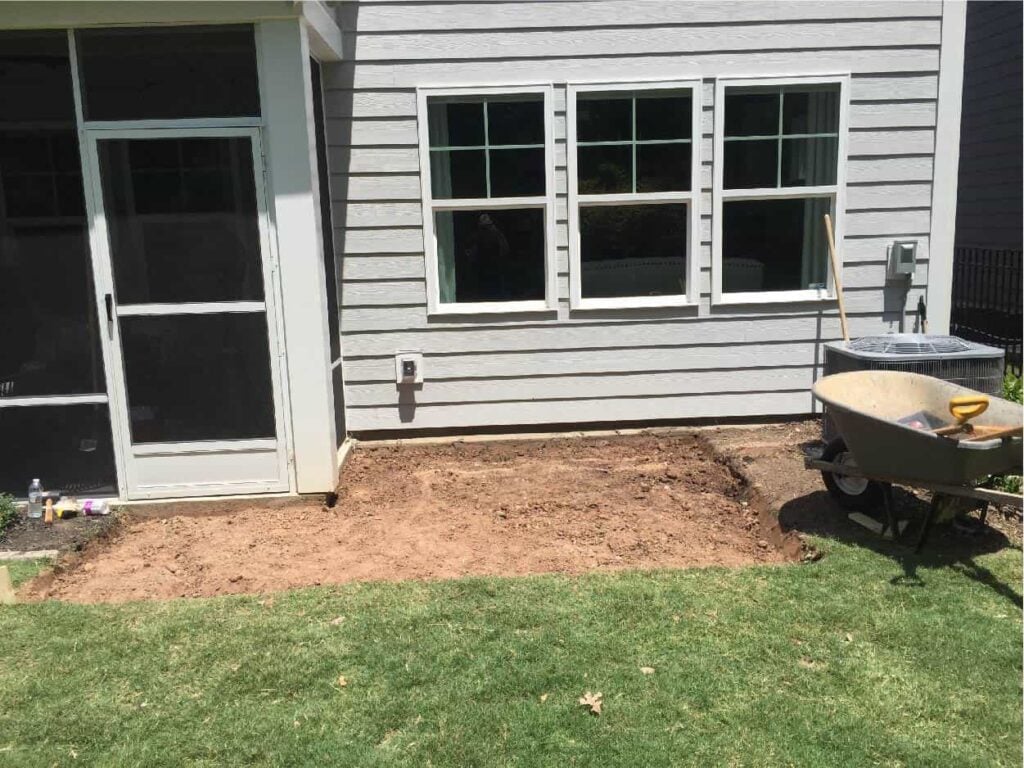
Step 2: start digging
Remove the top layer of grass or mulch first. Then dig at least 5 inches deep. If your soil is like ours (hard red clay), you can get away with digging only 4″ deep.
Note: if you carefully remove grass in 1 ft x 1 ft pieces, you can use it to fill in bare areas in your yard.
STEP 3: compact the soil
Once you get down to the desired depth, compact the soil using the hand tamp/compacter to make sure you have a nice solid base.
Step 4: add gravel
Add your ¾” crushed gravel to the hole. Your wheelbarrow will come in handy here to help you get the rock from your driveway to the patio location. We ended up with about a 2.5” thick layer of gravel, but you’ll need a couple more inches of rock if you have softer soil.
Compact the gravel using the hand tamp/compactor. Watering down the rocks at this stage will help with the compacting.

Step 5: add landscape fabric
Add your heavy-duty landscape fabric. Get the heaviest duty with the longest guarantee you can find. We all know you don’t want to pull weeds constantly or dig everything up to replace it in a few years.
Note: make sure you overlap your landscape fabric pieces enough where there won’t be gaps for weeds to find their way through.

Step 6: Add sand
Pour the sand until you have a 1” layer of sand on top of the landscape fabric. As you’re pouring, make sure to pour the sand on in a direction where it won’t lift up the overlapping pieces of landscape fabric.

Step 7: level the sand
Level the sand using a 2×4 or a long space piece of wood. Add a level to the top of the board (we just taped one on) so that you can check that the patio is sloping away from your house. This is very important-make sure that no part of your patio slopes where water will run towards your house or pool in one area. It is very important to make sure that your patio slopes down and away from your foundation.

Step 8: install your pavers
Once leveled out and sloped away from your house, it’s time to install the pavers. Start in the highest side corner and work your way out from there to ensure that you are maintaining your slope away from the house. We checked each piece with the level as we went and adjusted the sand layer as needed to ensure they were level and firmly in place.
Use spacers as you go. The manufacturer recommends at least 3/16” space between each paver so they don’t hit each other and crack off pieces.

As we installed this same patio at our new house, we found a process that worked pretty efficiently. We found that it was easiest to sweep the sand so that it was flat and level for one paver at a time. Then, we tamped the sand for that one paver and then placed the paver down. Tamping the sand first helped prevent the paver from settling and becoming uneven.
optional Step 9: apply edge restraint
Once all the pavers are firmly in place with their spacers, you can apply an edge restraint if the ground isn’t solid around it to hold it in place. Since ours was surrounded on all sides by hard ground, we decided not to use them.
Step 10: Add polyermic sand
Remove the spacers and immediately sweep the polyermic sand into the cracks until they are all filled to the top. Then blow off the excess and water down the patio according to the directions on the sand so that it can set in place.

There you have it! Now you have a beautiful new patio to enjoy for years to come. If you liked this tutorial, be sure to pin the image below to share with others or save for later.

More Outdoor Ideas…
DIY Privacy Screen | Wood Planter Box | $3 Cedar Hanging Planter Box | One Day Patio Furniture Update Using Spray Paint | Easy Cable Railing Deck Upgrade


")


Those porcelain patio pavers look amazing! Love the vision, and most especially the step-by-step guide on how you did it. I am a paver installer myself, and I just like what you did here. Great job!