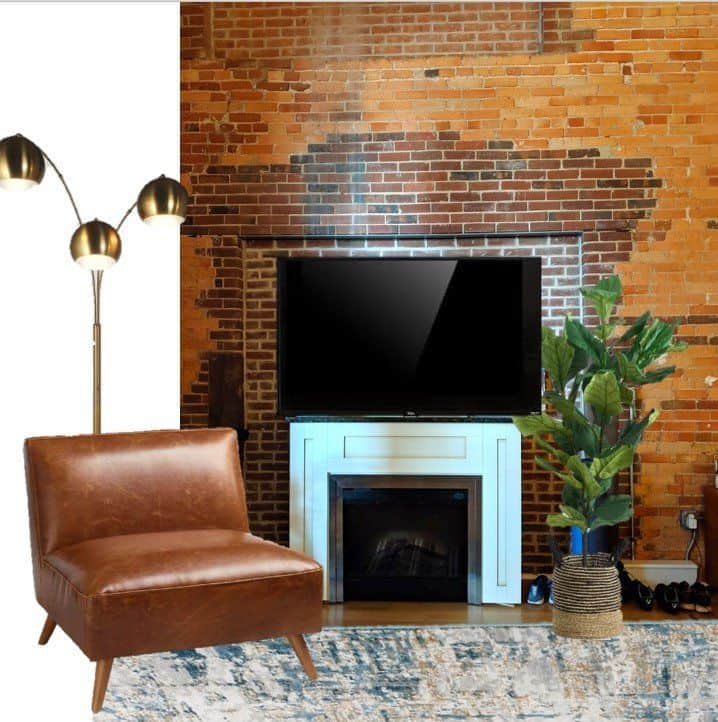
Ah mood boards–they are a staple in interior design and allow you to visualize how all of the pieces of your design work together. Sometimes a mood board works to solidify your idea, sometimes it makes you aware that some of your choices might not be great together.
Mood boards get a bad rep for being difficult to create and requiring fancy software, but that doesn’t have to be the case. Today I’ll walk you through how to create a simple mood board using Microsoft PowerPoint.
Alright, let’s start designing!
Optional step 0: Take a photo of the space you want to create a mood board for and upload it into PowerPoint.
Step 1: Select which items you want to be in the room
Try to find photos online that have a solid background to make things easier later.

Step 2: Add your images to PowerPoint
To do this, right click on an online photo of an item you want in the room, select “copy image.” Then go back to PowerPoint and right click and select “paste picture,” which you can find under “paste options.”
Step 3: remove background
Click on the photo –> format –> remove background. Powerpoint will automatically select some of the background to delete (anything pink will be deleted), but you can adjust their selection using the “mark areas to keep” and “mark areas to remove” option.
Alternate between the “mark areas to keep” and “mark areas to remove” options until you are satisfied with the photo. To use the “mark areas to keep” option, simply select the option and draw lines on places you would like to keep in the photo. Once you’re happy with your photo, click “keep changes.

step 4: size the items
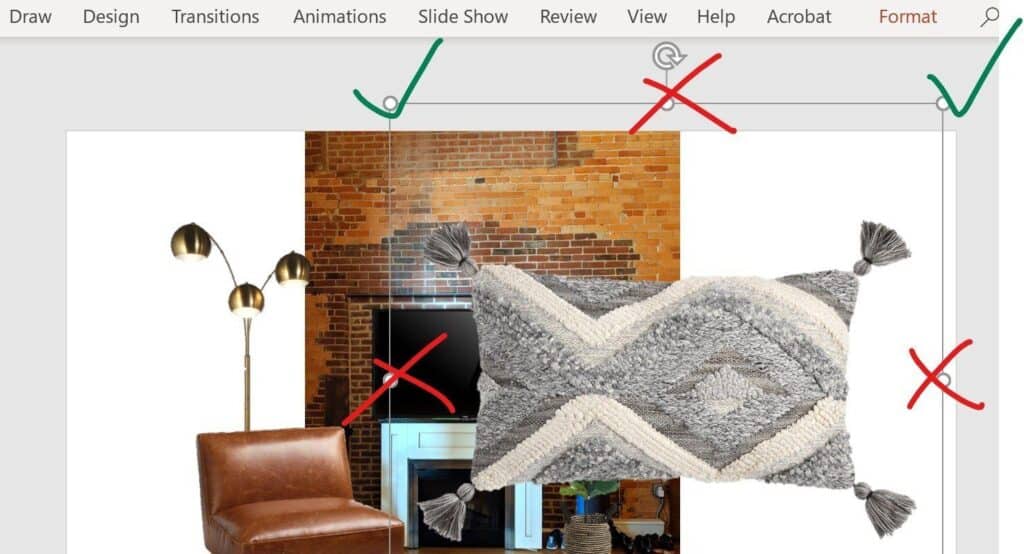
To do that, click and hold the corner of the photo and drag in or out depending on whether you want to make it larger or smaller. Only adjust using the corner handles! If you use the top or side handles, you will warp the photo and the proportions will be off.

Step 5: arrange furniture
If something you want to be on top is behind another image or vice versa, you can right-click the image and click “bring to front” or “send to back” based on your needs.
Now you know the basics to creating a mood board in PowerPoint! Happy designing friends! Send us a picture of your mood boards on Instagram–we’d love to see what you’re designing!

